
Freelander Service Procedures
ENGINE - K SERIES KV6
12-3-54 REPAIRS
10. Using a mallet, gently tap sump sideways to
break sealant bond, remove sump.
CAUTION: Do not lever between sump and
lower crankcase.
Refit
1. Using a suitable cleaning solvent, clean sump
and mating face on lower crankcase. DO NOT
use a metal scraper on sealing surfaces.
2. Apply a 2 mm (0.1 in) bead of sealant, Part No.
STC 4600 along centre of sump flange, then
spread to an even film using a roller.
CAUTION: To avoid contamination,
assembly must be completed immediately
after application of sealant.
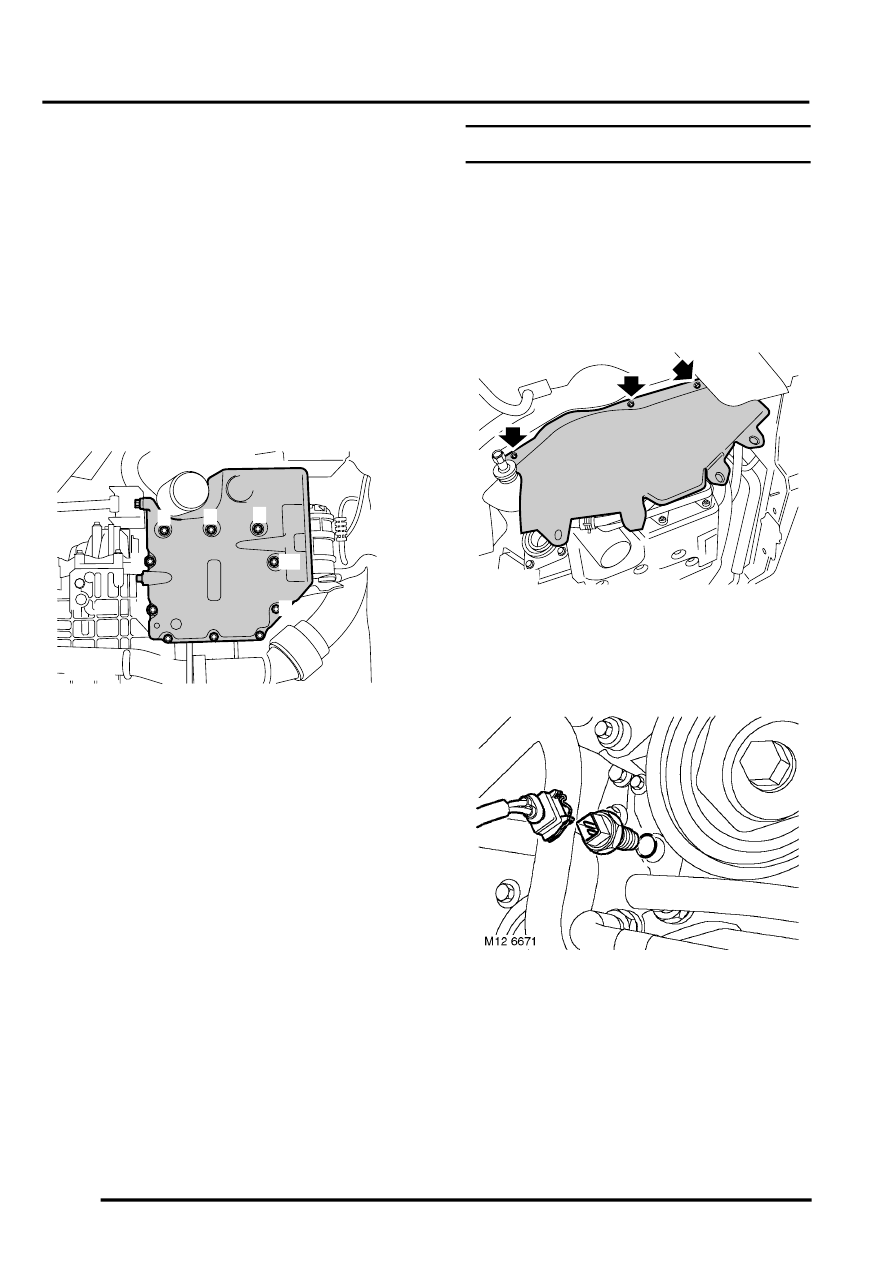
3. Position sump, fit bolts and tighten
progressively in the sequence shown to 35 Nm
(26 lbf.ft).
4. Fit bolts securing IRD support bracket to sump
and tighten to 88 Nm (65 lbf.ft).
5. Position engine oil cooler to mounting bracket,
fit and tighten nuts to 25 Nm (18 lbf.ft).
6. Position dipstick tube to sump and cylinder
block, fit bolt and tighten to 9 Nm (7 lbf.ft).
7. Fit splash shield and secure with bolts.
8. Fill engine with correct quantity and grade of oil.
9. Fit engine acoustic cover.
ENGINE - K SERIES KV6, REPAIRS,
10. Connect battery earth lead.
Switch - oil pressure
$% 12.60.50
Remove
1. Disconnect battery earth lead.
2. Remove underbelly panel.
3. Remove RH front road wheel.
4. Remove 3 bolts securing RH splash shield to
body and remove shield.
5. Place container below oil pressure switch to
collect spillage.
6. Disconnect multiplug from oil pressure switch.
7. Remove oil pressure switch and discard
sealing washer.
M12 6675
10
9
1
3
5
8
4
7
2
6
M12 6614