
Freelander Service Procedures
INTERIOR TRIM COMPONENTS
76-3-8
REPAIRS
Trim casing - body side - rear - 3 door
$% 76.13.57
Remove
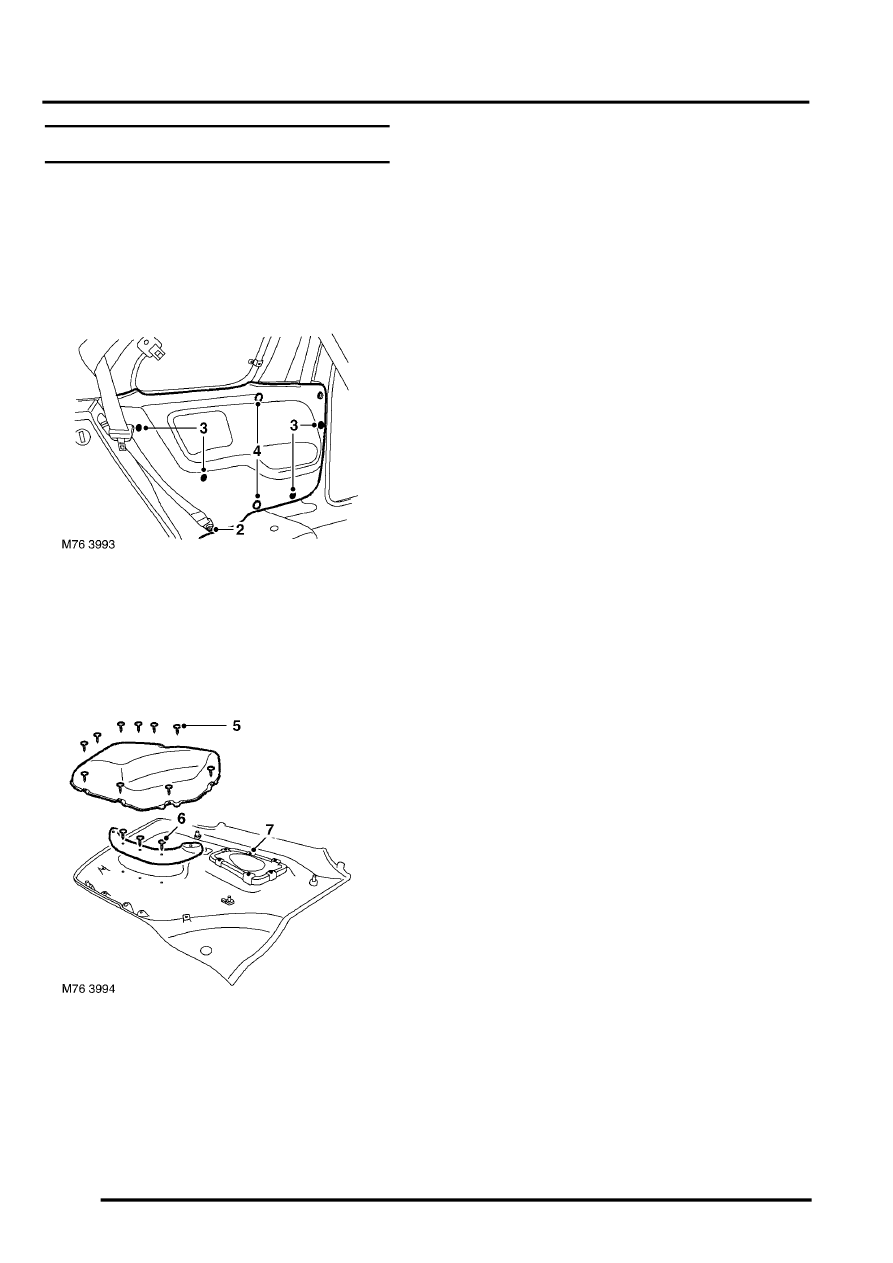
1. Remove rear seat.
SEATS, REPAIRS, Rear seat - LH.
SEATS, REPAIRS, Rear seat - RH.
2. Remove Torx bolt securing rear seat belt lower
fixing to body and position seat belt aside.
3. Remove 4 Torx bolts securing trim casing to
body.
4. Release 2 trim clips and trim casing.
5. Disconnect multiplug from tweeter if fitted.
6. Remove trim casing.
Do not carry out further dismantling if
component is removed for access only
7. Noting the position of the 3 long screws,
remove 10 Torx screws and remove pocket
from trim casing.
8. Remove 3 screws securing pocket finisher to
trim casing and remove finisher.
9. Release 6 tags and remove speaker grille.
Refit
1. Position speaker grille on replacement casing
and secure tags.
2. Fit pocket finisher and secure with screws.
3. Fit pocket and secure with Torx screws.
4. Fit trim clips to trim casing.
5. Position trim casing and if fitted connect
tweeter multiplug.
6. Fit trim casing to body and secure with clips and
Torx screws.
7. Fit seat belt lower fixing and tighten Torx bolt to
50 Nm (37 lbf.ft).
8. Fit rear seat.