
Range Rover P38
CHASSIS AND BODY
45
REPAIR
OUTER WAIST SEAL - REAR DOOR
Service repair no - 76.31.54
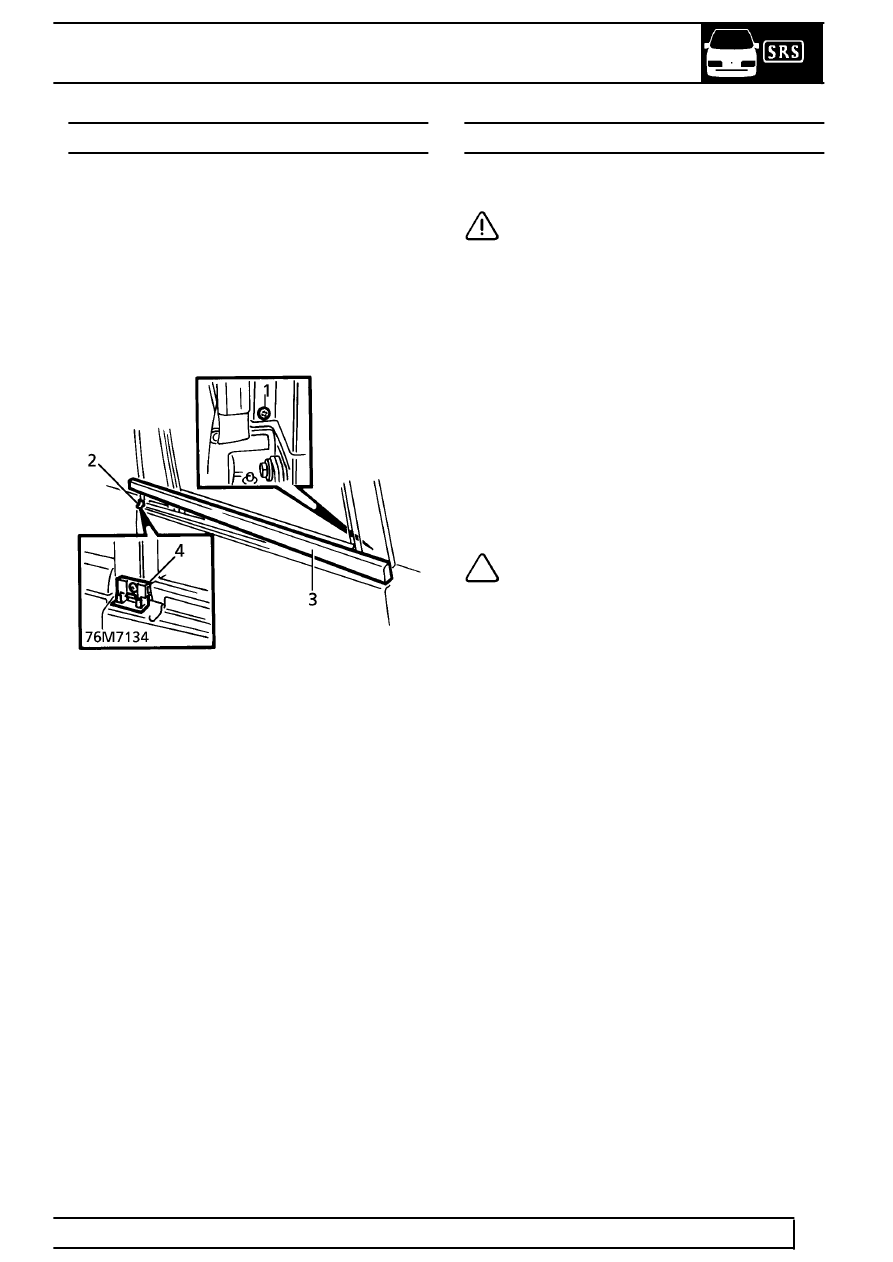
Remove
1. Remove screw securing seal finisher to forward
edge of door.
2. Release seal finisher from clip at rear edge of
door.
3. Remove seal and finisher assembly.
4. Remove screw and securing clip.
Refit
5. Fit clip to door, secure with screw.
6. Fit seal and finisher assembly to door. Align at
forward edge, secure with screw.
RUBBING STRIPS & DOOR FINISHERS
Remove
CAUTION: When removing exterior trim,
NEVER lever directly against body panels.
Use an approved trim fork. Protect body
panel with suitable material, such as fabric
covered hardboard.
Rubbing Strip - Front Fender
1. Remove relevant wheel arch liner.
See this
section.
2. Remove nut securing forward edge of rubbing
strip.
3. Remove rubbing strip from single clip.
Rubbing Strip - Rear Quarter Panel
4. Release 5 clips securing rubbing strip. Remove
strip.
NOTE: Rearmost clip is unique.
Rubbing Strips - Front & Rear Doors
5. Remove nut securing rear of rubbing strip.
6. Front Door Rubbing Strip: Release 5 clips
securing rubbing strip.
7. Rear Door Rubbing Strip: Release 3 clips
securing rubbing strip.
8. Remove rubbing strips.
Lower Door Finishers
9. Remove screw securing rear of finisher.
10. Front Door Finisher: Release 5 clips securing
rubbing strip.
11. Rear Door Finisher: Release 3 clips securing
rubbing strip.
12. Remove finishers.
Refit
13. Reverse removal procedure.