
Range Rover Classic
BRAKES
17
REPAIR
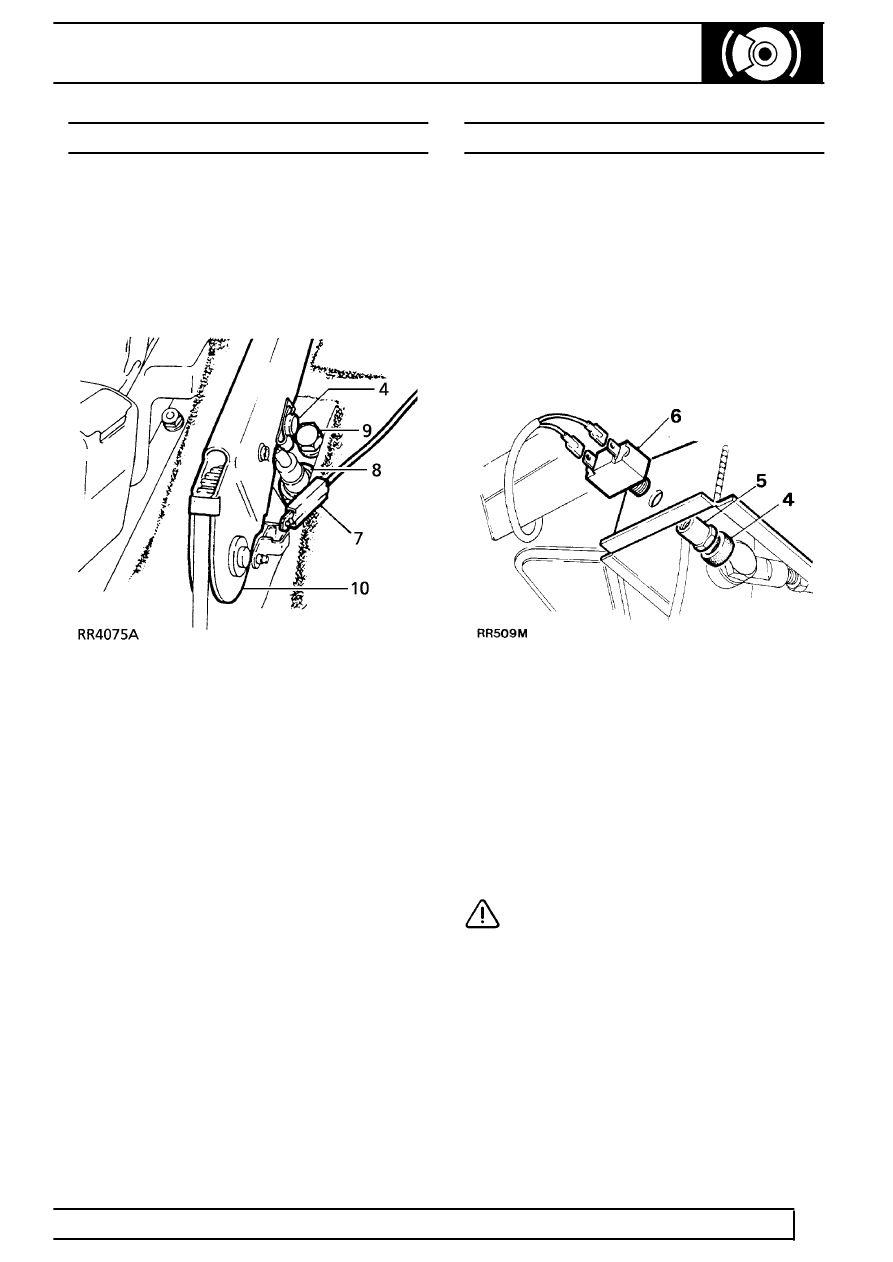
PARKING BRAKE LEVER
Service repair no - 70.45.01
Remove
1. Disconnect battery negative lead.
2. Chock road wheels and release parking brake.
3. Remove centre console assembly.
See
CHASSIS AND BODY, Repair, Centre
Console
4. Remove spring clip and clevis pin.
5. Disconnect parking brake cable from lever.
6. Raise parking brake lever fully.
7. Disconnect electrical lead from parking brake
warning switch.
8. Release parking brake cable outer retaining nut.
9. Remove 2 bolts securing parking brake
mounting bracket.
10. Remove parking brake lever assembly from
parking brake outer cable.
Refit
11. Position parking brake lever over parking brake
cable and secure in position.
12. Secure parking brake outer cable to mounting
plate, tighten nut securely.
13. Reverse removal procedure. Ensure electrical
wiring does not become trapped between mating
faces.
14. Check parking brake adjustment.
See SECTION
10, Maintenance, Vehicle Interior
STOP LIGHT SWITCH - NON ABS
Service repair no - 86.65.51
Remove
1. Disconnect battery negative lead.
2. Remove lower dash panel.
3. Depress foot brake.
4. Remove rubber protector from switch, if fitted.
5. Remove hexagon nut.
6. Withdraw switch.
7. Disconnect electrical leads.
Adjust
8. With switch still in position and multiplug
disconnected, connect an ohmmeter across
switch terminals.
9. Screw switch in until open circuit exists across
terminals with pedal released and continuity
exists as soon as pedal is depressed.
10. Tighten locknut.
CAUTION: Ensure switch does not prevent
brake pedal returning fully.
Refit
11. Reverse removal procedure.